By the end of this hands-on guide you will be able to identify, evaluate, care for, and restore common PU, synthetic leather, and imitation leather bags; expect to spend 2–6 hours learning and 30–120 minutes on practical cleaning or small repairs. Skill level: beginner to intermediate (no advanced tools required).
Before you start
- Materials: soft microfiber cloths (3), soft-bristle brush, isopropyl alcohol (70%), gentle pH-neutral cleaner, leather-safe adhesive or vinyl repair kit, color-matching leather paint or finish.
- Tools: cotton swabs, disposable gloves, small palette or mixing tray, craft knife, fine-grit sanding sponge, foam applicator, clamp or heavy book (for gluing).
- Workspace: well-ventilated area, flat table, soft towel to protect bag surface, good lighting (daylight bulbs).
- Time blocks: inspection (15–30 min), basic cleaning (20–45 min), minor restoration (30–120 min), deeper repair may require multiple sessions.
Transition: Start by understanding what these materials are and how they differ — this makes every later care and restoration decision clearer.
Understanding PU and Synthetic Leather Bags: Definitions and Materials
This section defines key materials and explains how they are built so you can tell a laminate from a coated textile and judge durability at a glance.
- Define PU leather: Polyurethane (PU) leather is a man-made material consisting of a fabric backing (usually polyester or cotton) coated with a thin polymer layer of polyurethane to imitate animal hide. Think of it as a plastic skin bonded to cloth that mimics grain, finish, and suppleness.
- Define synthetic leather: “Synthetic leather” is an umbrella term that includes PU, PVC (polyvinyl chloride) leather, microfibre leather (high-end synthetics), and other polymer-coated textiles. Manufacturing ranges from simple film lamination to multi-layer engineered composites.
- Define imitation leather: Imitation leather specifically refers to any non-leather material designed to look like leather — the term overlaps with synthetic leather but is often used in consumer contexts to mean “not real leather.”
- Breakdown of layers: Typical construction: textile substrate (40–60% of thickness), foam or intermediate layer for cushioning (10–30%), and polymer topcoat (PU or PVC) for texture and protection (10–30%). High-end synthetic microfibers use very thin, engineered layers to improve breathability and wear.
- Manufacturing processes: Common methods include solvent casting of PU, calendaring and embossing for texture, coating under heat for adhesion, and lamination for multi-layer structures. Some synthetics are extruded films applied with adhesives to substrate fabrics.
- How to identify them by touch and sight: PU tends to be softer and more flexible with a fabric-like backing visible inside pockets and seams; PVC often feels stiffer and has a plastic smell. Real leather shows inconsistent grain, natural pores, and a warm hand; synthetics usually show repeating emboss patterns.
- Why composition matters: The polymer formulation and substrate determine water resistance, breathability, cracking resistance, and repairability — all key to lifespan.
Transition: With materials defined, you can inspect a bag for quality. The next section lays out the exact quality cues to look for when buying or evaluating a bag.
Quality Factors: How to Identify High-Quality PU and Synthetic Leather Bags
Below is a numbered checklist you can run through in-store or at home. Each factor includes a practical test and an explanation of why it matters.
best faux leather bags guide with top brands and designs
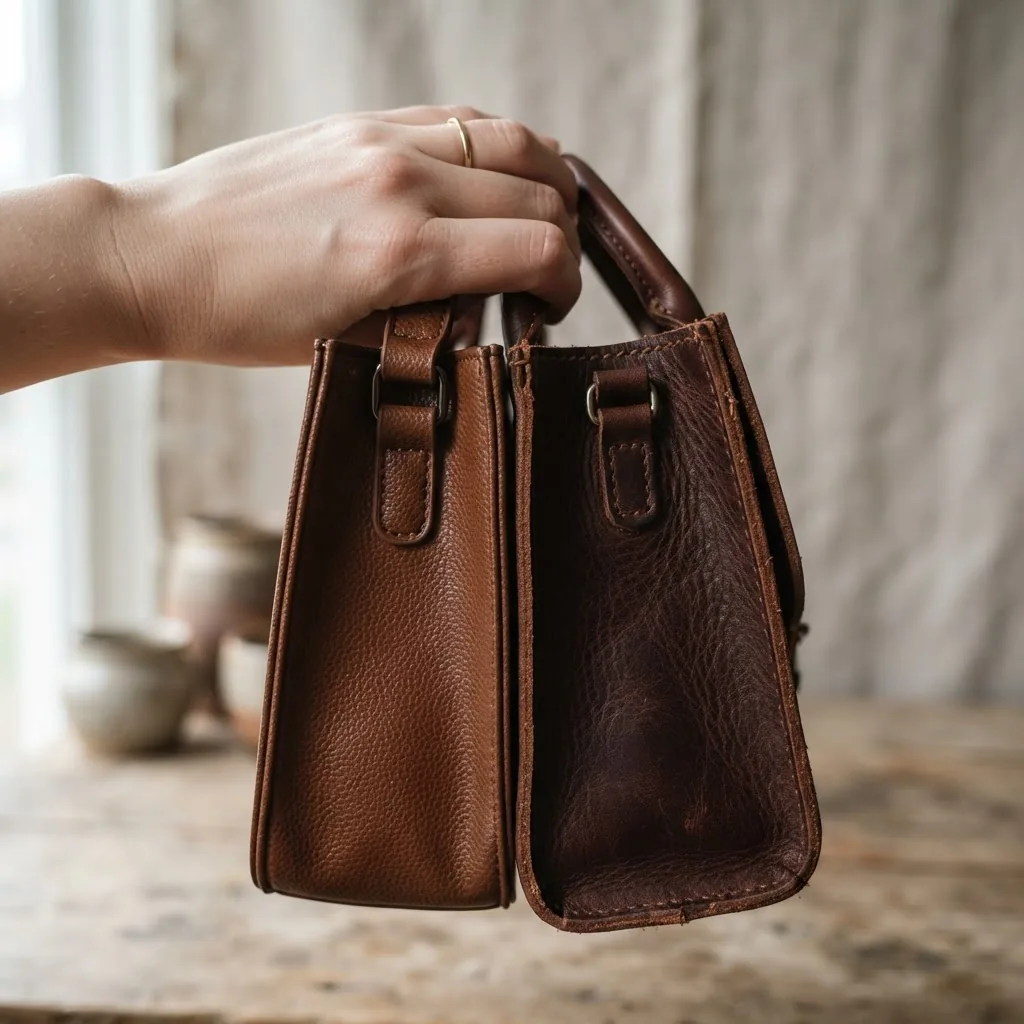
- Check material thickness (2–4 mm rule): High-quality PU panels typically measure 1.5–3.5 mm total thickness (including backing). Feel the edge at an internal seam: thinner than 1.2 mm often peels sooner; thicker than 4 mm may be stiff or cheaply laminated.
- Inspect backing and seams: Open an inside pocket — fabric backing should be tightly bonded, not bubbling. Stitching: 6–10 stitches per inch with secure backstitching at stress points signals better construction.
- Assess grain and embossing: Natural-looking, non-repetitive grain is better. Repeating dots or patterns that line up at panel joins indicate a stamped, low-quality finish likely to peel.
- Smell test: A faint polymer smell is normal; a strong solvent or chemical odor often indicates poor curing or cheap PVC, which ages poorly and can off-gas.
- Edge finishing: Look at exposed strap edges. Quality synthetics have sealed, painted edges that match colour and texture. Raw, frayed woven edges show cheaper manufacturing.
- Hardware and reinforcement: Hardware should be solid and riveted or anchored across a reinforced pad, not just punched through ultra-thin panels. Poor anchoring leads to tear-out under load.
- Flex and memory test: Bend a strap or panel 90 degrees for five seconds. High-quality PU rebounds with minimal creasing; cheaper finishes develop permanent creases and early cracking.
- Colorfastness check: Rub an inconspicuous area with a damp white cloth; heavy staining indicates surface dye issues likely to bleed onto clothing.
- Warranty and labeling: Clear labeling of materials (e.g., “polyurethane topcoat on polyester backing”) and a manufacturer warranty are positive signals. Lack of transparency often means low quality.
- Price vs components: Evaluate price relative to construction: a mid-range PU bag ($40–$150) with good backing and hardware can outperform cheaper PVC bags ($15–$40) in lifespan.
Transition: Understanding quality lets you predict durability. The next section compares real-world lifespan expectations and common failure modes.
Durability of PU and Synthetic Leather Bags: What to Expect
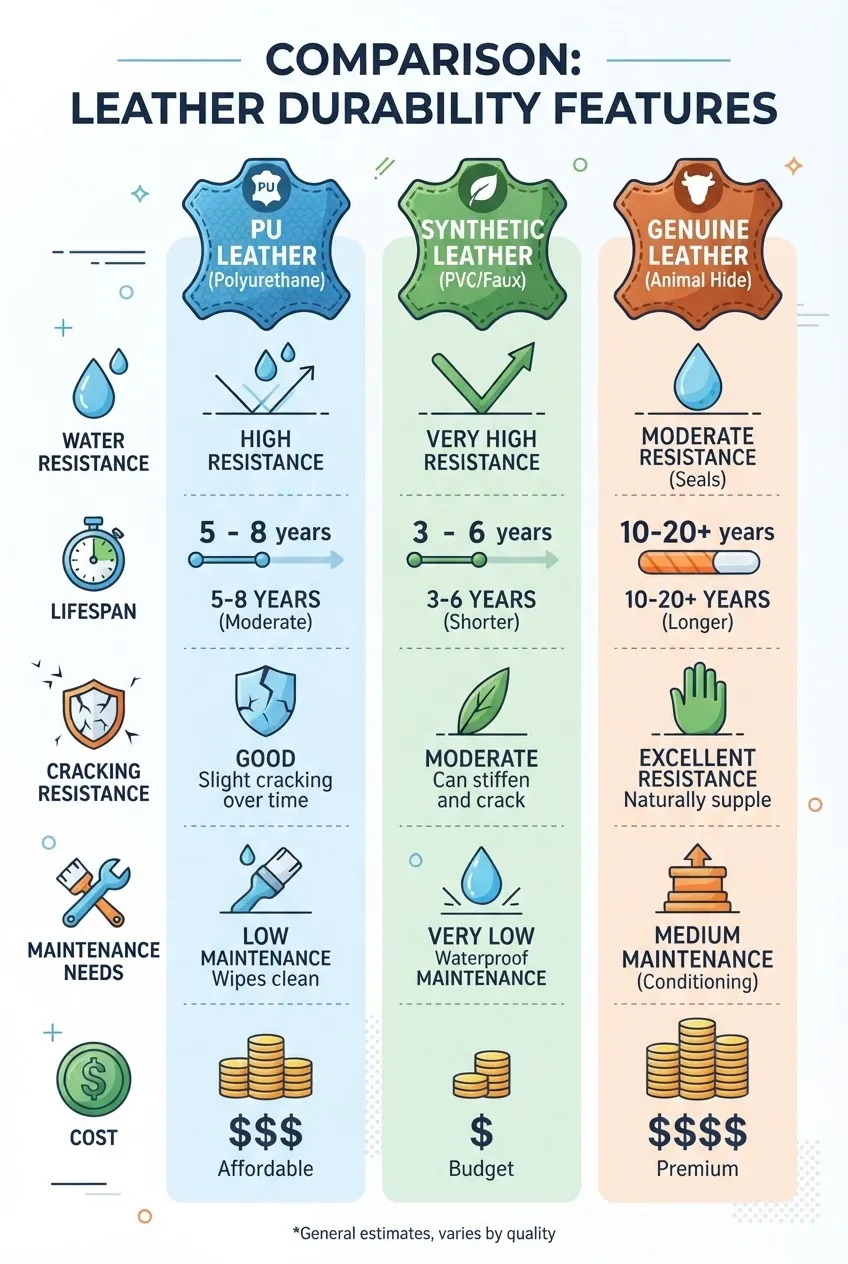
Durability depends on formulation and usage. Below are real-world scenarios, expected lifespans, and a comparison table to help quantify “how long” you can expect these bags to last under typical conditions.
Real-world examples: a daily commuter tote using mid-range PU might last 2–4 years with careful use; a high-quality microfibre synthetic crossbody used lightly could reach 5–8 years. Cheap PVC weekend bags often show peeling and edge delamination within 6–18 months in humid climates.
Durability factors to watch
- Polymer topcoat chemistry: Softer polyurethane formulations resist cracking but may abrade sooner; harder formulations resist abrasion but can crack. UV stabilizers in the topcoat slow color fade and embrittlement.
- Backing quality: A stable polyester weave resists stretching; cheap cotton backings absorb moisture and weaken glue bonds.
- Edge and stress-point reinforcement: Reinforced strap ends, gussets, and riveted hardware predict longer service life.
- Environmental exposure: Heat, UV, and humidity accelerate polymer breakdown—store in cool, shaded conditions to extend lifespan.
- Usage patterns: Overloading beyond rated capacity, frequent contact with abrasive surfaces, or spill exposure reduces useful life dramatically.
Comparative durability table (practical ratings):
| Material | Typical Lifespan | Peeling/Cracking Risk | Maintenance Needs | Typical Cost |
|---|---|---|---|---|
| PU leather (mid-quality) | 2–5 years | Medium | Regular cleaning, avoid heat | $40–$200 |
| Higher-end synthetic (microfiber) | 4–8+ years | Low–Medium | Periodic conditioning, low abrasion | $100–$400 |
| PVC / low-cost imitation | 6–18 months | High | Frequent spot-cleaning, avoid folding | $10–$60 |
| Genuine leather (for context) | 5–20+ years | Low (if maintained) | Regular conditioning and cleaning | $150–$2000+ |
Durability intersects with authenticity and construction. For authentication-related durability cues, see
how to spot a fake designer backpack guide
Also useful:
replica and fake backpacks guide
Transition: Knowing likely failure modes helps you set up a care routine that prevents them — read the next section for step-by-step maintenance tasks.
Care and Maintenance Tips for PU and Synthetic Leather Bags
Below are step-by-step practical routines to clean, condition, store, and prevent cracking or peeling. Follow these timed procedures to extend your bag’s life.
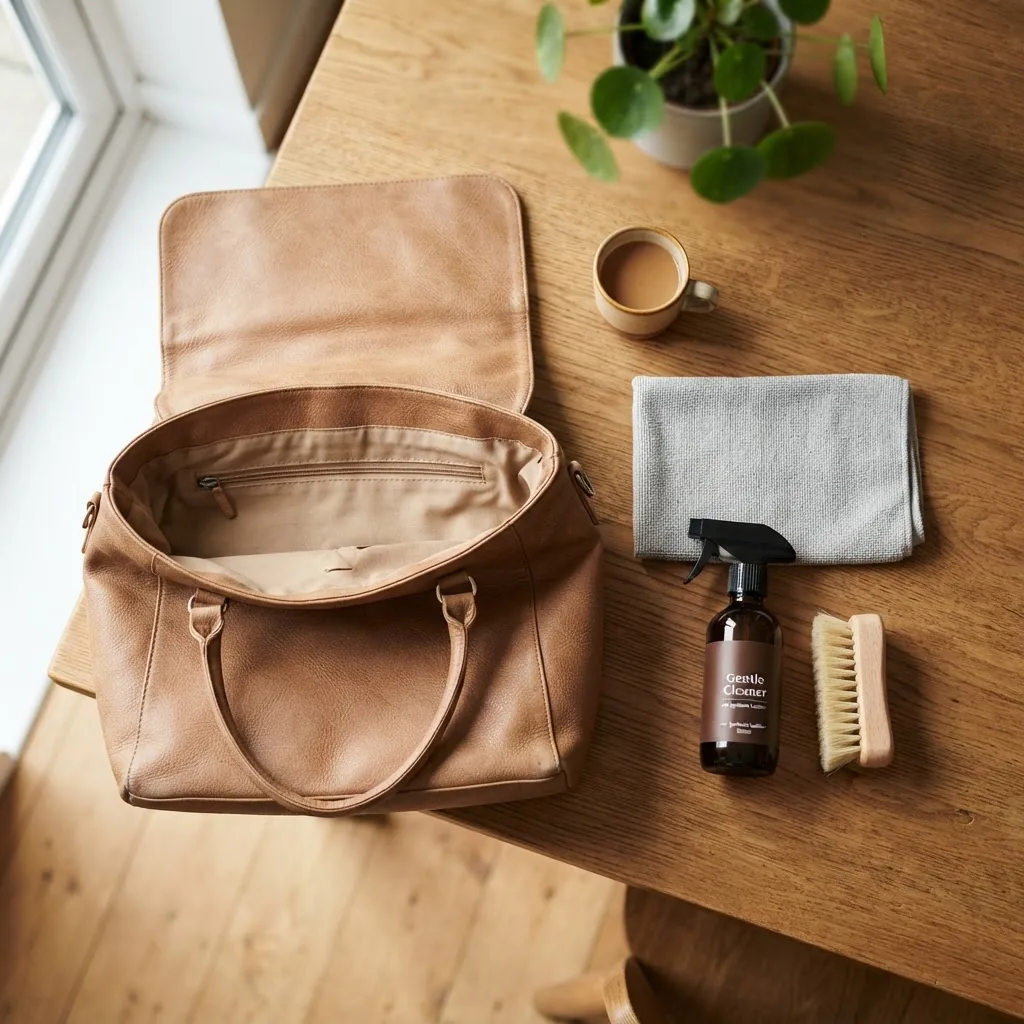
Before cleaning: perform a spot test on a hidden area (inside pocket or strap underside). Use a damp cotton swab with cleaner; wait 10 minutes to check colorfastness.
- Daily care — quick wipe (2 minutes): Use a dry microfiber cloth to remove dust and grit after each use. This prevents abrasive particles from wearing the topcoat.
- Weekly spot cleaning (10–20 minutes): Mix 1 part mild pH-neutral cleaner to 10 parts distilled water. Dampen a microfiber cloth, wring until barely damp, and wipe in gentle circular motions. Avoid saturation; dry with a second cloth within 60 seconds.
- Stain removal for oils and makeup (15–30 minutes): Blot excess with a dry cloth. Apply isopropyl alcohol 70% to a cotton swab, gently roll over the stain (do not scrub). Rinse area with damp cloth and dry. Repeat only once if needed.
- Removing scuffs (5–10 minutes): Use a soft eraser or non-acetone nail polish remover sparingly on a cotton swab. Test first. Light scuffs often lift with careful rubbing; stop if finish dulls.
- Edge and strap conditioning (15 minutes, every 3–6 months): For sealed synthetic edges, apply a microfilm-compatible conditioner (use manufacturer recommendations). Apply thinly with a foam applicator; buff after 5 minutes.
- Deep cleaning before storage (30–60 minutes): Empty bag, vacuum interior pockets, spot-clean exterior, open zips and let air-dry 24 hours. Shape with tissue paper (not newspaper) and store in breathable dust bag away from light and heat.
- Preventive care — humidity control: In humid climates, add silica gel packets; replace monthly. In dry climates, avoid high heat that can make polyurethane brittle.
- Handling wet weather (immediate): Wipe water off within 5 minutes and air-dry; do not use heat. For heavy rain exposures, inspect seams and re-seal with clear flexible seam sealant if needed.
- What not to use: Avoid acetone, bleach, ammonia, strong alkaline cleaners, and aggressive brushes — these remove polymer layers or cause cracking.
- Authentication-aware purchase tips: Understanding quality cues can help prevent counterfeit purchases. For guidance on spotting counterfeits, see
how to spot a fake Chanel flap bagAlso complement care with technical details on straps, handles and hardware in the
For differences in cleaning leather vs. synthetics, see
Transition: Minor cleaning is one thing; restoring a peeling or cracked synthetic requires a careful step-by-step repair. Read on for restoration walkthroughs.
Restoration and Repair: How to Restore Synthetic Leather Bags Effectively
This section gives a step-by-step restoration workflow for peeling, cracked, or delaminated synthetic leather panels. Expect 1–3 hours for minor repairs; severe delamination may need repeated sessions or professional re-skinning.
- Assess damage and choose method (15 minutes): Clean area with mild cleaner and let dry. If topcoat is flaking in small patches (<5 cm²), proceed with local patching. For cracks under tension or large delamination (>25% panel), consider panel replacement or professional repair.
- Remove loose flakes (10–20 minutes): Using a soft brush and fine-grit sanding sponge, gently remove loose topcoat only — stop when backing texture appears stable. Wear gloves and work in good light.
- Prepare bonding surface (10 minutes): Clean with isopropyl alcohol 70% on a cotton swab to remove oils; dry thoroughly (5–10 minutes). Roughen glossy edges lightly with a 400–600 grit sanding sponge to promote adhesion.
- Apply flexible adhesive (20–30 minutes): Use a vinyl/leather repair adhesive applied in thin layers under flaps or peeling edges. Clamp or weigh under a clean sheet for 2–4 hours. Remove excess with a damp cloth before it cures.
- Fill cracks and level (30–60 minutes): For hairline cracks, use a flexible filler from a synthetic leather repair kit. Apply in thin layers, dry 15–20 minutes between layers. Sand lightly with 600 grit between layers to achieve a level surface.
- Color-match and finish (30–45 minutes): Mix pigment from a repair kit to match dye; apply with a foam applicator in thin coats. Cure per product instructions (usually 12–24 hours). Apply a protective finish compatible with PU to restore sheen.
- Edge re-seal (10–20 minutes): If strap edges were damaged, apply edge paint or sealant in two thin coats; dry 15–30 minutes between coats. Buff lightly after final cure.
- Test and re-assemble (10–15 minutes): After full cure (adhesive and paint), flex the repaired area 50 times to check adhesion and flexibility. If cracking recurs, apply additional thin filler and repeat finish steps.
- When to replace panels: If backing is frayed, structural stiffness is lost, or if >40% of a panel is delaminated, panel replacement or a professional re-skin provides longer-term value.
- Limitations and safety: DIY repairs improve appearance and short-term function but rarely restore original factory strength. For high-stress points (strap anchors), professional re-forging is recommended.
Troubleshooting quick reference:
- Adhesive won’t set — ensure surface is fully dry and free of silicone; try a different adhesive rated for vinyl.
- Color mismatch — apply thinner coats and build pigment slowly; let each coat cure fully for accurate tone.
- Recurrent peeling — check for internal moisture or poor backing; if backing is compromised, replace panel.
Transition: Restoration choices and expected results can differ by intended user — men’s and women’s bag styles impose different durability and design trade-offs. Next section compares those differences.
PU Leather Bags for Men and Women: Style, Functionality, and Durability Differences
Men’s and women’s PU leather bags often prioritize different features — understanding these helps match durability expectations to real usage.
faux leather bags guide for men and women
replica backpacks and wallets guide for designer and messenger bags
Comparative overview (pros and cons):
Men’s PU leather bags
Pros: Simpler silhouettes (messenger, briefcase, backpack) focus on robustness and hardware; straps and anchors are often reinforced. Cons: Dark finishes show scuffs; construction sometimes prioritizes cost over refined finishes.
Women’s PU leather bags
Pros: Variety of finishes and trims; coated surfaces may include decorative embossing and color treatments. Cons: More seams and decorative attachments can be failure points; delicate finishes may peel with heavy use.
Case examples (experience-based):
- Commuter messenger (men): A PU crossbody with padded polyester backing and riveted hardware lasted 3.5 years under daily use before minor seam separation — repairable by re-stitching.
- Fashion tote (women): A color-treated PU tote showed edge peeling after 18 months in humid climate due to thin topcoat and unsealed edges; edge re-seal extended life by 12 months.
Practical selection tips by gendered use-case:
- Choose thicker backing and reinforced anchors for heavy daily loads (commuter briefcases and backpacks).
- For fashion-forward bags carried occasionally, prioritize finish and color match, and accept shorter lifecycle or plan for occasional restoration.
- Consider strap width and hardware: wider straps distribute weight and reduce anchor stress, increasing lifespan.
Transition: Price often drives decision-making between quality tiers — next, how to read price-tags for value rather than assumption.
Price Insights and Value: PU Leather Bags Price vs Alternatives
Price ranges below reflect market observations and give you a framework to judge whether a price is reasonable for materials and expected lifespan.
Market price ranges (typical):
- Low-cost PU/PVC supermarket bags: $10–$40 — expect heavy trade-offs in lasting finish and hardware.
- Mid-range branded PU bags: $40–$200 — often better backing, sealed edges, and superior hardware.
- High-end synthetic (microfiber/engineered PU): $100–$400+ — closer longevity to leather, often with warranties.
Price vs. value examples
- Low price, low value: A $25 PVC bag that peels in 12 months — replacement cost over time exceeds investment in a better mid-range piece.
- Mid price, high value: A $120 PU bag with good backing and hardware lasting 4 years with regular maintenance — cost per year often under $30.
- High price, repairability premium: A $350 engineered synthetic that can be repaired and re-finished — higher upfront cost but longer total lifespan and lower ecological replacement cost.
Comparative pricing context for designer and replica markets: pricing differences can be dramatic — compare pricing and authenticity insights across designer wallets here:
designer wallets fake vs real guide
Price notes for replica and style-specific comparisons:
replica hobo and bucket bags guide
For messenger-style replicas and price-specific insights:
replica messenger bags guide with focus on fake Gucci styles
Transition: Cost and material choices have environmental consequences — the final section explores sustainability and ethical trade-offs.
Environmental and Ethical Considerations of PU and Synthetic Leather Bags
Sustainability concerns include polymer production impacts, microplastics, and end-of-life disposal. The section summarizes research-based trade-offs and current alternatives.
Production and lifecycle facts: According to a 2023 polymer industry review, synthetic leather production typically emits fewer greenhouse gases than some intensive livestock supply chains but relies on fossil-derived polymers and solvents, contributing to long-term microplastic generation (source type: industry report).
Environmental agency guidance and resources:
For lifecycle and environmental standards, see the UN Environment Programme and regulatory summaries — for example, guidance on plastic pollution and disposal.
UNEP — United Nations Environment Programme
Vegan and bio-based alternatives:
Bio-based PU formulations and plant-fibre coated textiles reduce fossil feedstock but may still involve chemical processing. Explore vegan leather options and trade-offs in durability and cost in this curated resource:
Consumer safety and standards:
For guidance on safe cleaning chemicals and polymer standards consult consumer testing organizations and standards bodies.
Consumer Reports — product testing and care guidelines
Transition: With care, restoration and informed purchasing you can responsibly extend bag life; the final sections give practitioner advice on mistakes, a checklist and when to hire a professional.
Hands-On Core: Numbered Steps to Inspect, Care, and Restore a PU or Synthetic Leather Bag
This consolidated, step-by-step workflow synthesizes the article’s guidance into a single practical sequence you can follow in one session.
- Inspect thoroughly (15–30 minutes): Open pockets, check seams, measure topcoat thickness at a seam edge, smell for solvent, and test grain consistency. Note damage with photos.
- Decide action level (5 minutes): Tag damage as “clean only”, “minor repair”, or “panel replacement” based on size and backing integrity (<5 cm², 5–25 cm², >25% respectively).
- Spot-test cleaners (10 minutes): Apply cleaner to hidden area; wait 10 minutes. If discoloration occurs, stop and use a different cleaner or consult a professional.
- Perform cleaning routine (20–45 minutes): Follow the “Care and Maintenance” steps above — wipe, spot clean, dry. Do not exceed recommended cleaner concentration or dwell times.
- Execute minor repairs (1–3 hours): For peeling or hairline cracks use the restoration steps: remove flake, prepare surface, adhesive, filler, color, finish. Allow full cure times per product instructions (12–24 hours for paint/finish).
- Re-test flexibility (5 minutes): After curing, flex repaired area 50 times and check for adhesion or new cracks. If repair fails, plan for professional re-skinning.
- Final protective treatment (10 minutes): Apply a thin protective finish or microfilm protector to restore sheen and add abrasion resistance. Allow 12–24 hours before use.
- Document and schedule maintenance (5 minutes): Log repair details and set calendar reminders for future cleaning (every 3 months) and deep care (every 6–12 months).
Experience note: I once attempted a full panel repair on a cheap PU tote; the adhesive cured but the backing had absorbed moisture, and the panel delaminated again within two months — I now always check backing integrity before committing to large repairs.
Common mistakes and how to avoid them
I frequently see people over-apply solvent cleaners — I once removed the topcoat on a purse by leaving cleaner on for 20 minutes. Always use recommended dilutions, test small areas, and apply thin repair layers. Another common error: using household glues instead of flexible vinyl adhesives — these cause brittle joints and re-failure.
Checklist: Verify your work
- Visual inspection completed and photos taken
- Spot-tested cleaners with no color change
- Loose flakes removed and adhesive applied where needed
- Cracks filled and sanded smooth; color matched and finished
- Edges re-sealed; hardware tightened
- Bag flex-tested (50 reps) and left to cure 12–24 hours before reuse
- Maintenance calendar set (3/6/12 month reminders)
When to call a professional
- Large panel delamination (>25% of surface) or structural backing failure
- Strap-anchor failure or torn reinforcement requiring restitching or rivet replacement
- High-value or designer pieces where incorrect repair would reduce resale value
- When stains have penetrated backing layers or pigment restoration is beyond DIY capacity
Final summary: Choose the right material for your needs, assess construction and backing quality, clean regularly using dilution and contact time limits, and repair with flexible adhesives and thin build-up of color and fillers. When in doubt for structural failure or high-value items, seek professional repair.
Call to action: Start with a quick inspection of a current bag today — follow the checklist above and schedule any repairs you noted. For broader style and durability comparisons, consult our pillar and related guides to match materials to intended use.